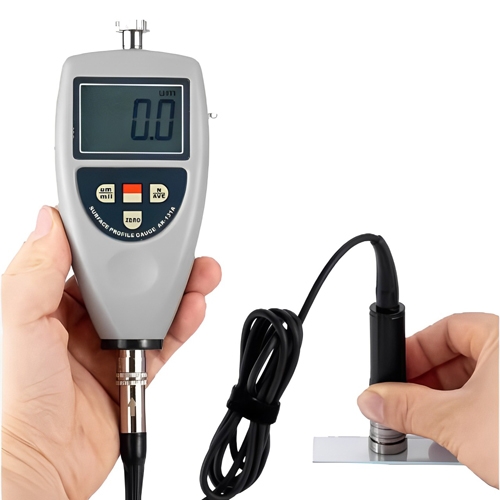
A surface roughness tester is an instrument used to evaluate the surface quality of parts. It can measure the roughness of various parts surfaces. In simple terms, it measures the surface smoothness (i.e., the degree of convexity and concavity) of an object, including planes, bevels, outer cylindrical surfaces, inner hole surfaces, deep groove surfaces, and bearing raceways. This tester realizes multifunctional and precise measurement of surface roughness. In modern manufacturing, the requirements for precision and surface quality are increasing day by day. Surface roughness is a key quality indicator that has a direct impact on the performance, appearance, and service life of the product. Therefore, in order to meet the needs of different industries, choosing the right surface roughness measuring instrument is essential to ensure product quality and improve production efficiency.

Types of Surface Roughness Testers
Depending on the measurement principle and application scenario, surface roughness measuring instruments can be divided into two categories: contact measuring instruments and non-contact measuring instruments.
Contact Measuring Instruments
This type of instrument has a diamond stylus at one end of the sensor rod, and the tip curvature radius of the stylus is very small. During measurement, the contact measuring instrument directly contacts the measured surface through the stylus or probe. The driver is used to drag the sensor at a certain speed. Due to the ups and downs of the profile of the measured surface, the stylus will move up and down when sliding on the measured surface. This movement causes the magnetic core to move up and down synchronously, so that the inductance of the two differential inductor coils surrounding the outside of the magnetic core changes, and the microscopic roughness of the surface is sensed. These changes can be amplified and processed by electronic devices, and a signal proportional to the displacement of the stylus can be output, and then the surface roughness Ra value can be directly read through the indicator.
Common contact roughness meters include inductive, piezoelectric, photoelectric, laser, and grating types, and can also be divided into guide head type and non-guide head type. The guide head roughness meter is limited to measuring surface roughness, while the non-guide head roughness meter can be used to measure surface waviness and surface geometry in addition to surface roughness.
This type of instrument is suitable for measuring various materials and shapes, with wide applicability, simple operation, and high measurement accuracy and stability. It is widely used in automotive parts, aerospace, mold manufacturing,g and other fields. The disadvantage is that it needs to contact the measured surface, which may cause scratches on the surface, especially for soft or precision surfaces. In addition, the stylus needs to be cleaned and calibrated regularly to ensure measurement accuracy.

Non-Contact Measuring Instruments
Non-contact measuring instruments mainly refer to the use of optical, laser, or ultrasonic technologies to measure the reflection, scattering or echo signals of the surface to obtain the parameters of surface roughness. This type of instrument will not damage the measured surface and is suitable for materials with high surface protection requirements, such as semiconductors. Common non-contact measurement methods include light sectioning, real-time holography, speckle method, astigmatism measurement, optical heterodyne method, AFM, optical sensor method, etc. It is widely used in electronics, optoelectronics, semiconductors, and other fields, especially for high-precision measurement of tiny features and film thickness. The limitations of non-contact measuring instruments are also obvious. They are usually more expensive than contact measuring instruments and are affected by factors such as surface reflectivity and ambient light.
Therefore, when choosing a surface roughness tester, users need to weigh these advantages and disadvantages according to their specific needs and application scenarios to choose the most suitable instrument.
Daily Maintenance of Surface Roughness Tester
Daily maintenance of the surface roughness tester is essential to maintain the accuracy of the instrument and extend its service life. The following are some daily maintenance suggestions summarized by SISCO online store for you.
First of all, the storage environment of the instrument should avoid exposing the instrument to harsh environments, such as heavy dust, moisture, oil, strong magnetism, etc. Avoid placing the instrument in places with large vibrations, strong magnetic fields, and large temperature changes. In addition, since the sensor is a precision component of the instrument, it should be stored in the box in time after use. Avoid causing severe vibration to the sensor. Bumping, bumping, and falling may damage the sensor. In order to extend the life of the roughness tester and ensure the accuracy of its measurement, the ambient temperature should be between 19℃~21℃ and the humidity should be between 50%~60%.
If it is idle for a long time, special attention should be paid to the maintenance of the battery. The battery voltage should be charged in time when it is insufficient. It is allowed to plug in the power adapter during work, but it may affect the test accuracy when testing samples with low Ra values. If the voltage is still insufficient after charging for several hours or the voltage is insufficient after a short period of use after being fully charged, the battery needs to be replaced. At the same time, avoid damage to the battery due to overcharging for a long time.
Check the tip of the stylus regularly to ensure that there is no wear or damage. If wear is found, replace it with a new stylus in time. Clean the stylus regularly to remove any dirt or residue. Use ethanol (or alcohol above 95%) and a dust-free cloth to clean the machine, but be careful to avoid alcohol contact with the standard film. For optical components, it is necessary to clean the lens and optical window, using special lens cleaning paper and detergent.
The standard film is a precision calibration film and cannot be cleaned with alcohol or other cleaning fluids. If there is dirt, just blow it off with a blower pump. Be especially careful when plugging and unplugging the sensor at any time, and be careful not to touch the guide head and stylus, because these are the key parts of the entire instrument. Try to hold the root of the sensor guide head bracket (the front of the main body) to plug and unplug. When the measurement error exceeds the range of ±10%, and the user confirms that the error is not caused by human factors, the machine can use the special software calibration function. The calibration value is a percentage that indicates the percentage increase (or decrease) in the calibrated measurement result relative to the uncalibrated measurement result.

