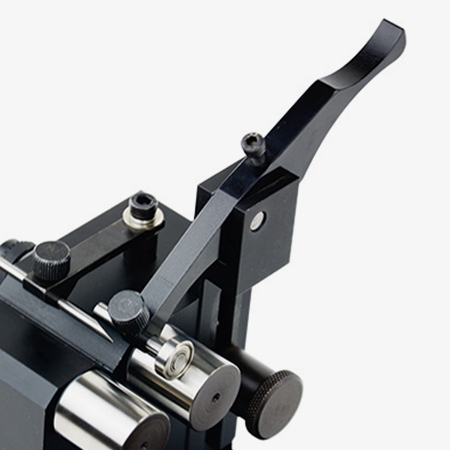
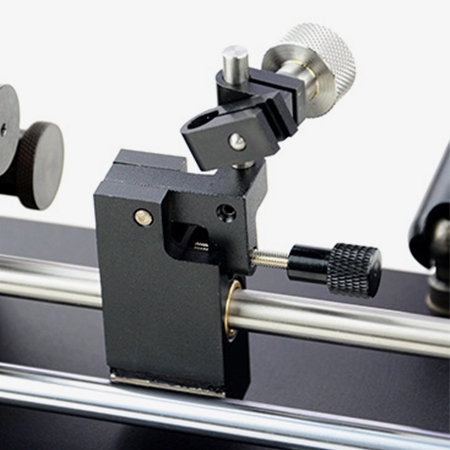
The 0.002mm accuracy concentricity tester with double dial offers 0.002mm head accuracy for precise concentricity measurement. It delivers fast measurements, saving time, and allows for single or dual dial attachments. With simple manual operation, lightweight design, and easy maintenance, the concentricity measuring tool is highly convenient. Adjustable features, including a handle-operated pressure roller and micro-adjustment stand, make it adaptable to various workpiece sizes.

Adjustment Function and Efficiency
- The concentricity measuring instrument can adjust the height and pressure roller position according to the diameter of the workpiece using the handle.
- Fast measurement saves time.
- The tester can be equipped with a single or dual gauge for measurement.

Stand and Convenience of the Concentricity Tester
- Equipped with a micro-adjustment stand.
- High precision instrument, with head accuracy of 0.002mm.
- Manual measurement, easy to operate.
- Strong versatility, lightweight, easy to move, and simple maintenance.
Application
The concentricity tester measures the alignment of an object's central axis to ensure concentricity. It is widely used across industries: in aerospace, it verifies the alignment of parts in aircraft engines and spacecraft; in the automotive industry, it ensures precise alignment of components like engines and transmissions; and in electronics, it checks the concentricity of motors and other precision components; in mechanical manufacturing, it checks the concentricity of rotating parts like shafts and bearings. These applications highlight the importance of concentricity for product quality and performance.

Automotive Industry

Electronics

Mechanical Manufacturing

Aerospace
| Model | Roller | Applicable Diameter (mm) | Applicable Length (mm) | Main Head Accuracy | Configuration | Number of Dail |
| SISCO-CT-B10 | Cylindrical | 3-35 | 1-102 | 0.002 | Dial Stand + Fixture Slider | Double Dials |
| SISCO-CT-B10 | Single Groove | 3-35 | 1-102 | 0.002 | Dial Stand + Fixture Slider | Double Dials |
| SISCO-CT-B20 | Cylindrical | 10-50 | 1-152 | 0.002 | Dial Stand + Fixture Slider | Double Dials |
| SISCO-CT-B40 | Cylindrical | 20-102 | 1-203 | 0.002 | Dial Stand + Fixture Slider | Double Dials |
Accessories

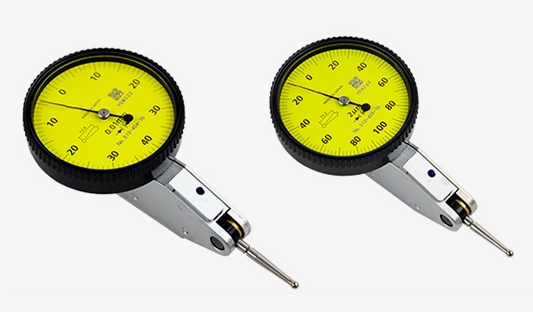
| Dial Model | Graduation Value | Measuring Range | Dial Reading | Measuring Force |
| 513-404C/0.01 | 0.01 | 0-0.8mm | 0-40-0 | <0.3N |
| 513-405E/0.002 | 0.002 | 0-0.2mm | 0-100-0 | <0.3N |
(Note: The indicator's accuracy should match or be lower than the instrument's accuracy; otherwise, a high-accuracy indicator won't provide practical benefits, and a low-accuracy indicator won't fully utilize the instrument's potential.)
Q1: What is a concentricity tester?
A1: A concentricity tester is a precision measurement tool used to assess the alignment of the centers of two or more parts, ensuring they are concentric (i.e., share the same center axis). This tool is commonly used in machining and manufacturing to check the concentricity of components like shafts, bearings, and other cylindrical parts. By rotating the component and measuring any deviation from the desired axis, the tester provides insight into the part's precision and how well it will function in an assembly. Concentricity gauges are crucial in quality control to minimize mechanical errors, reduce wear and tear, and improve the overall performance of the finished product.
Q2: How does a concentricity tester work?
A2: A concentricity tester works by measuring the alignment between the center axes of a part and its rotating reference. The part being tested, typically a cylindrical component like a shaft, is mounted securely on a spindle or fixture. As the part rotates, one or more dial indicators or measuring probes are placed at key points along the part's surface, often at both ends. These indicators measure any deviation from the ideal concentric position, detecting even small variations in the part's roundness or alignment. The concentricity measuring equipment records the amount of offset or eccentricity, providing a precise measurement of how much the part deviates from being perfectly concentric. This helps ensure high precision in manufacturing, reducing mechanical errors and improving the performance and longevity of the final product.
Q3: How to ensure proper maintenance and care for the concentricity testers?
A3: To ensure the proper functioning and longevity of the concentricity testers, it is important to keep all components clean. If there is fine dust, use a blower balloon to gently remove it, and if there are oil stains or fingerprints, wipe them off with a soft cotton cloth. Do not attempt to disassemble the instrument, as this could compromise its measurement accuracy or cause damage. When not in use, always cover the tester with a dust cover to prevent dust accumulation. Additionally, apply anti-rust oil and store the tester in a dry environment to avoid rusting. To maintain its performance, regular inspections are recommended. If you have any questions during use, please contact customer service for assistance.
Tips: What is the advantage of having two dials?
The advantage of having two dials on a concentricity tester lies in the ability to measure concentricity from two different reference points simultaneously, which increases the accuracy and reliability of the measurement. By using two dials, the concentricity measuring instrument can detect any variations in roundness or alignment from different angles, ensuring a more comprehensive analysis of the part's concentricity. This dual-dial setup allows for the identification of even the smallest deviations, which may not be detectable with a single dial. Additionally, it helps reduce errors caused by operator inconsistency and provides more consistent results, making it an ideal tool for high-precision applications where accuracy is critical.
Thank you for buying industrial test and measurement equipment on SISCO.com, all products sold by SISCO and the partner cover a 12 months warranty, effective from the date of receiving the products.
What is covered?
SISCO is responsible for providing free spare parts, and free technical support to assist the customer to repair the defective products until the problem is solved.
What is not covered?
- Product purchased from anyone other than a SISCO store or a SISCO authorized reseller.
- Expendable parts.
- Routine cleaning or normal cosmetic and mechanical wear.
- Damage from misuse, abuse or neglect.
- Damage from use of parts other than SISCO approved.
- Damage from use outside the product’s usage or storage parameters.
- Damage from use of parts not sold by SISCO.
- Damage from modification or incorporation into other products.
- Damage from repair or replacement of warranted parts by a service provider other than a SISCO authorized service provider.
- Damage caused by the application environment not meeting the product usage requirements and the failure to perform preventive maintenance.

