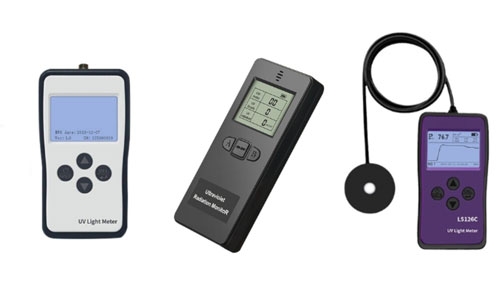
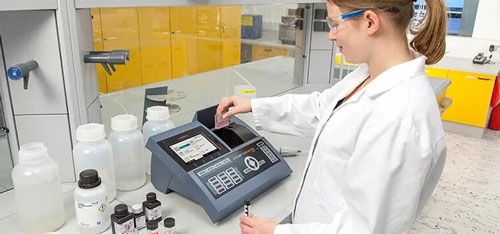
UV meters are important tools used to measure the intensity of UV radiation and are widely used in scientific research, industrial production, environmental monitoring and health care. Regardless of the quality of your instrument, regular calibration is essential to maintain its accuracy and performance. This comprehensive guide will walk you through the process of calibrating your UV meter, ensuring you get the most accurate readings possible.

Tools Required for UV MeterCalibration
Standard UV Light Source: Mercury lamp is a commonly used standard ultraviolet light source. It emits UV light of specific wavelengths, such as 253.7nm, and its radiation intensity is relatively stable under certain conditions. Mercury lamps require regular calibration and maintenance to ensure their accuracy as a standard light source.
Deuterium lamp is also one of the commonly used standard UV light sources. It has a broad emission spectrum in the UV band and is suitable for calibrating broad-band UV meters. The deuterium lamp has a relatively long service life, but it is also more expensive. In the use of deuterium lamp, pay attention to its warm-up time and working current to ensure its stable operation.
Spectrometer: Spectrometers are used to analyze the wavelength and radiation intensity distribution of UV sources. In the calibration of the UV meter, the wavelength and intensity of the standard UV light source can be precisely measured by the spectrometer to provide accurate data reference for the calibration of the UV meter.
When choosing a spectrometer, consider its wavelength resolution, spectral range and sensitivity and other parameters. A high-resolution spectrometer can more accurately measure the wavelength of ultraviolet light, a spectrometer with a wide spectral range is suitable for calibrating multi-band UV meters, and a spectrometer with high sensitivity can detect weaker ultraviolet radiation.
Optical Power Meters: Optical power meters are used to directly measure the power of UV light. In UV meter calibration, the optical power meter measures the actual power of a standard UV light source and then compares it with the measurement of the UV meter to determine the measurement error of the UV meter.
Optical power meters are available in different measurement ranges and accuracies. When choosing an optical power meter, it is important to select the appropriate optical power meter based on the measurement range and accuracy requirements of the UV meter being used. For example, for the measurement of low-power ultraviolet ultraviolet meter, you need to choose a high-precision low-range optical power meter.
UV meter calibration procedure
Preparation
- Check the Calibration Environment: The calibration environment should be kept clean and dry to avoid the influence of dust and water vapor on the calibration results. The ambient temperature and humidity should be controlled within a certain range, generally at 20 - 25°C and 40% - 60% humidity. This is because temperature and humidity affect the performance of the UV meter and the standard light source.The calibration environment should be free from strong light interference, especially from other UV sources. Equipment such as shades can be used to shield the calibration from external light.
- Warm-up Equipment: Preheat the standard UV source and the UV meter. For example, mercury lamps generally need to be warmed up for 15 - 30 minutes to ensure that their radiation intensity stabilizes. The UV meter should be warmed up according to its manual, usually for 5 - 10 minutes. Do not operate the equipment during the preheating process to avoid affecting the preheating effect.
- Check the Equipment Connection: Ensure that the connections between the standard UV light source, spectrometer, optical power meter and other equipment are correct and firm. If cable connection is used, check whether the cable is damaged and whether the plug is tightly inserted. For equipment connected by wireless, check the strength and stability of the wireless signal.
- Calibration Protocol: Follow the calibration guide provided by sisco.com or consult with our technical support team for assistance.

Single-point calibration method operation steps
The single-point calibration method is a relatively simple calibration method. According to the measurement wavelength range of the ultraviolet meter, select a specific wavelength and intensity of the standard ultraviolet light source as a reference point, such as the measurement of 253.7nm wavelength of the ultraviolet meter, select the mercury lamp as the standard ultraviolet light source.
Place the UV meter directly in front of the standard UV source, making sure that the optical axes of the two coincide. A device such as a light stand can be used to adjust the position of the UV meter so that the detector of the UV meter can accurately receive the UV light from the standard UV source. Turn on the standard UV source and the UV meter, and when both have stabilized, read the measured value of the UV meter. Record this measurement.
Based on the known radiation intensity of the standard UV source and the measured value of the UV meter, the correction factor is calculated according to the formula in the single-point correction method. In subsequent measurements, multiply the measurement result of the UV meter by the correction factor to obtain the corrected measurement value.
Multi-point calibration procedure
Multi-point calibration is a more accurate calibration method. It selects multiple standard UV light sources of different wavelengths and intensities as reference points. Such as mercury lamps at different wavelengths and deuterium lamps at different intensities of the radiation source. The UV meter is aligned to these standard UV sources in turn, and the UV meter and standard UV sources are ensured to be stable before each measurement.
Read and record the measured value of the UV meter at each standard UV source. Based on the recorded data, mathematical software or manual calculations (e.g., least squares) are used to establish a calibration curve between the measured values of the UV meter and the radiation intensity of the standard UV source. In subsequent measurements, the UV meter measurements are calibrated by the calibration curve according to the measured UV wavelength and intensity.
Comparison Calibration Procedure
The comparison calibration method involves comparing the UV meter to be calibrated with a UV meter of the same type that has been accurately calibrated. Select a number of different UV sources, including natural light sources such as sunlight at specific times of day and artificial light sources such as different types of UV lamps. Measure the intensity of these UV sources simultaneously with the UV meter to be calibrated and the comparison UV meter.
During the measurement, make sure that the measurement conditions are the same for both, e.g., measurement distance, measurement angle, etc. Calculate the deviations between the measured values of the UV meter to be calibrated and the comparison UV meter. According to these deviations, adjust the UV meter to be calibrated, such as by adjusting the gain or offset parameters inside the UV meter to reduce the deviation.
Post-calibration check
Re-measure the standard light source. No matter which calibration method is used, after the calibration is completed, re-measure the standard UV light source with the UV meter. Check whether the measured value after calibration matches the known value of the standard UV source. If the deviation is within the allowable range, the calibration is successful; if the deviation is large, the calibration process needs to be rechecked to find the problem.
Record all the data during the calibration process, including the parameters of the standard UV source, the measured values of the UV meter, the calibration coefficients or calibration curves, etc., in detail. These records are very important for the subsequent use, maintenance and recalibration of the UV meter.
UV meter calibration of common problems and solutions
Measured value deviation is too large
Problem Analysis: The standard UV light source may be unstable, such as aging mercury lamps or insufficient warm-up time, resulting in its radiation intensity deviation from the standard value. The detector of the UV meter may be faulty or contaminated, affecting its normal reception and measurement of UV light.
The calibration environment does not meet the requirements, such as abnormal temperature and humidity or the presence of strong light interference, which affects the measurement results.
Solution: Check the status of the standard UV light source, replace the mercury lamp with a new one if the mercury lamp is aging, and extend the warm-up time if the warm-up time is not enough. Clean or repair the detector of the UV meter, if necessary, send the UV meter back to the manufacturer for professional repair.
Improve the calibration environment, adjust the temperature and humidity, exclude strong light interference.
Poor calibration curve fit
Problem Analysis: The number of standard UV light sources selected is too small or the wavelength and intensity distribution is unreasonable, resulting in the inability to accurately establish the calibration curve. There are errors in the measurement process, such as inaccurate placement of the UV meter, resulting in inaccurate measurement values, which in turn affects the fitting of the calibration curve. The mathematical method used to calculate the calibration curve is not properly selected or there are errors in the calculation process.
Solution: Increase the number of standard UV light sources and reasonably select their wavelengths and intensities to make the distribution of measurement points more uniform.
Re-adjust the position of the UV meter to ensure that it is accurately aligned with the standard UV light source and re-perform the measurement.
Choose appropriate mathematical methods, such as the least squares method, and carefully check the calculation process to ensure that the calculation is error-free.
Unstable measurement results after calibration
Problem Analysis: The internal circuit of the UV meter may have problems such as poor contact or aging components, which cause fluctuations in the measurement results.
The standard UV light source may flicker or have unstable intensity during operation. Factors such as temperature, humidity or electromagnetic interference in the calibration environment have changed after calibration, affecting the measurement stability of the UV meter.
Solution: Check the internal circuit of the UV meter, repair the poor contact problem, and replace the aging components.
Check the working status of the standard ultraviolet light source, if there are problems in time to solve, such as replacing the power supply or maintenance of the light source. Keep the calibration environment stable, and take measures to control factors such as temperature, humidity and electromagnetic interference.
Calibrating a UV meter is a critical process that ensures the accuracy and reliability of your UV measurements. By following the steps outlined in this guide, you can confidently calibrate your UV meter and maintain it for optimal performance. Remember, regular calibration and proper maintenance are key to getting the most out of your UV meter and ensuring the safety and effectiveness of your UV measurements.

